

The Art of Lighting in Visual Inspection: A Comprehensive Analysis of Front Lighting
In the previous content, we explored the wonders of transmitted lighting. And in today's content, let's continue to delve into another crucial aspect of the machine vision field - front lighting. In machine vision inspection, lighting is of utmost importance. It's no exaggeration to say that the quality of lighting directly determines half of the success or failure of a vision project. We've learned about backlighting before. Since there is backlighting, there must be front lighting. Today, we'll conduct a comprehensive analysis of front lighting.
Front lighting is mainly divided into two methods: high - angle lighting and low - angle lighting.
Let's start with high - angle lighting.
When high - angle lighting is used, the light rays shoot towards the inspection surface almost vertically. It's like the sun shining directly on a calm lake. The flat areas on the surface can reflect the light rays neatly into the lens.
Therefore, in the imaging screen, these flat parts appear particularly bright. Take the character inspection of bearings as an example. Through high - angle lighting, the surface of the bearing is evenly illuminated, and the characters stand out clearly, making it easy for the algorithm to recognize.
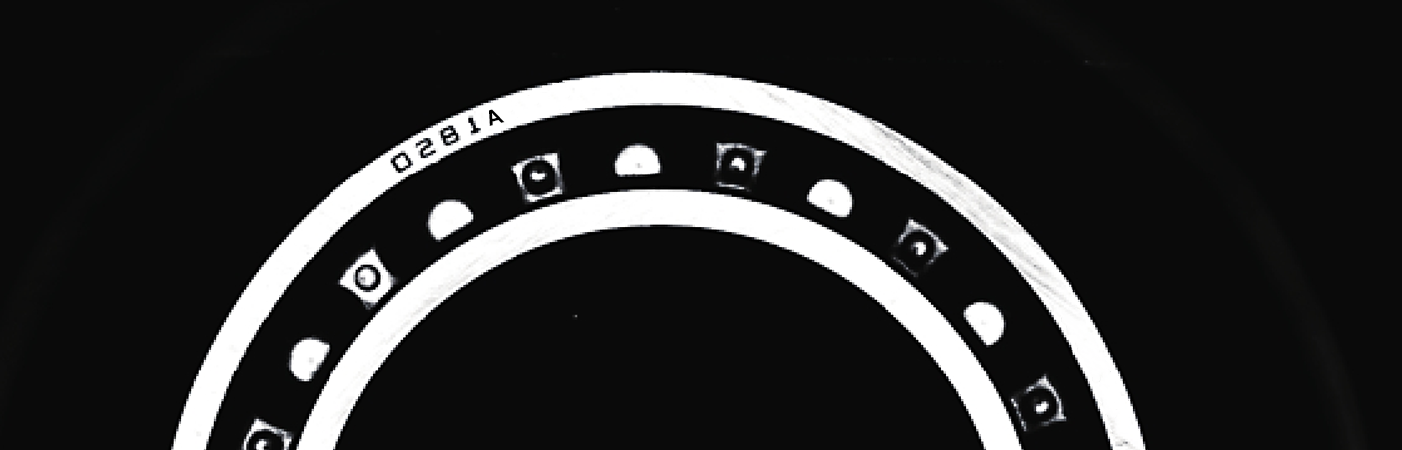
However, if the product surface is uneven, with complex structures such as pits and scratches, the situation is very different.
The reflection of light in these areas is chaotic, and very little light can be refracted into the lens smoothly. As a result, the final image appears dim, posing a significant challenge to the inspection.
Let's look at low - angle lighting.
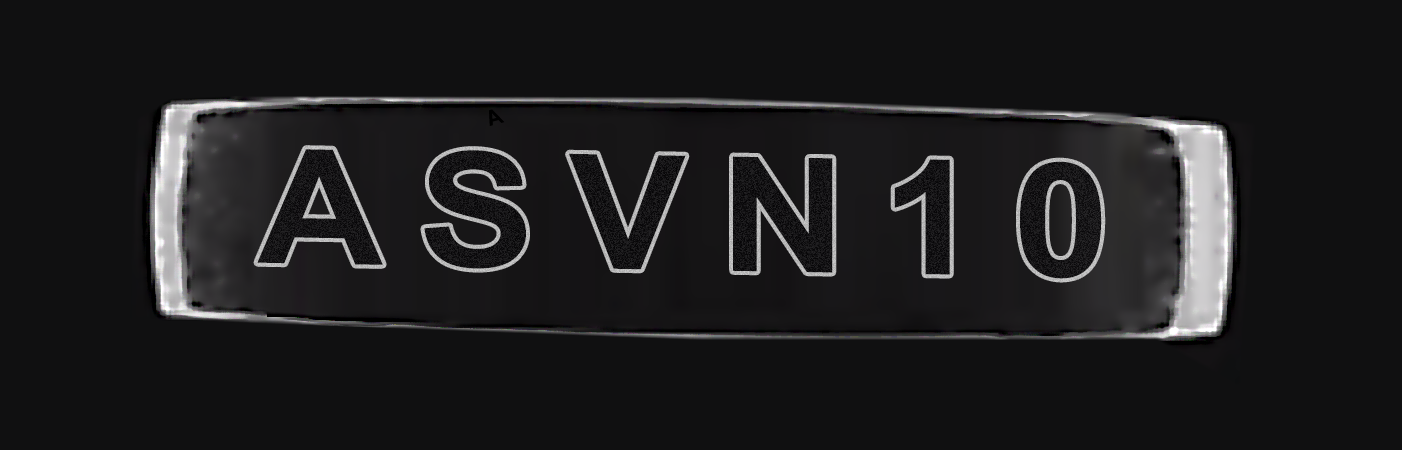
Which is the exact opposite of high - angle lighting. When using low - angle lighting, the direction of the light rays is almost parallel to the inspection surface, just like the setting sun shining obliquely on the ground. At this time, for the flat surface, since the light rays almost pass by it, very little reflected light enters the lens, so the flat parts in the image look dark. In the scenario of vehicle logo character inspection, low - angle lighting can be used to "darken" the background, making the characters stand out even more and greatly improving the inspection accuracy.
What's amazing is that when it comes to uneven areas such as pits and scratches, although the light is reflected in a messy way, quite a lot of it can still enter the lens by chance, making these areas appear bright in the image, which instead enhances the inspection recognition.
These two methods of front lighting each show their unique advantages in different scenarios. Of course, there are far more lighting methods in machine vision inspection than these. Lighting methods such as ring lights and coaxial lights also play key roles in their respective fields. HIFLY hopes everyone can share the lighting methods for visual inspection that they know in the comments section. Let's communicate and discuss together to study the art of machine vision lighting more thoroughly and enable visual inspection technology to play a greater value in fields such as manufacturing.